Be prepared for plenty of fun with this one! This Lego activity is full of suspense and excitement, and it is packed with learning opportunities across the STEM subjects.
We will explore gravity, mass, velocity, force, acceleration and friction. There will be plenty of problem solving too, as we discover the best way to build a creation to transport your Lego people down the zip wire safely!
What You Need
For this activity you will need:
- Lego figures of your choice
- Any Lego bricks will work
- Technic bricks are optional
- Something for the wire: wool, washing line, string, cotton. You may want to experiment with a few options
- Something to attach the ‘wire’ to, such as door handles, a tree, a fence, etc.
- You may also want to record your experiments, so grab a pen and paper, and maybe a timer too! Videoing it can be fun as well.

How to Set Up and Build
First of all, pick your spot for the zip wire. I like to do this activity outside when I can, as there is generally more space to play with, and the zip wire can be longer and start off from a higher point. However, working inside works just fine.
Next, tie or secure one end of your chosen ‘wire’ to something high, and secure the other end lower down. The wire should be quite taught so that the cart will be able to sail down it.
Now for the building, we are going to build a cart for your Lego figure to travel in. The aim is to get your Lego figure safely down the zip line without it falling out and to land without the cart breaking apart.
Think about how your cart will attach to the line before you start building. Perhaps you have bit you can detach and put the line through, Technic pieces are good for this or curved Lego bricks, remember it needs to move freely, or depending on the of attachment it might just be easier to thread the line through.
We used a Lego wheel, with the tyre removed. (the yellow piece) we then used a axle piece and some securing bits and built it around some technic bricks. (see picture)


Here Comes the Science Bit…
When we release the our Lego creation – which we can think of as the ‘mass’ – at the top of our line, gravity – the force – pulls the mass down the line.
As our mass goes down the line it accelerates until it can go no faster, at this point it reaches its maximum velocity – speed.
Friction is the force that stops speed increasing; this resistant force comes from the air resistance and the contact between the mass and the line itself. Without that friction, it would keep getting faster and faster, until it is stopped at the end (no pull of gravity left).
So we’ve just witnessed some pretty cool science. Gravity is powerful force, its pulled our Lego cart down the zip line.
DID YOU KNOW?
That when you created your lego creation to go down the zip wire you were already thinking scientifically, and exploring maths? You were working out what size to make it, how heavy to make it, what shape will work best, will it need to be symmetrical? You will be asking lots of questions while you make, and you might not even realise it – that’s because you are already a brilliant scientist, designer, and mathematician!
and Here is the Maths…
To extend this activity to include a bit more maths you can work out how quickly your creation has travelled down your zip line.
You might need an extra person to help with this, and you will need a stopwatch and maybe a tape measure (most smart phones have stopwatches on).
Use your stop watch to measure the time it takes for your Lego creation to travel from the start to finish – write this time down.
Now measure the distanced traveled. If you don’t have a tape measure, you can measure it in steps.
Using both the time and distance (values) and the following equation, we can work out how quickly your creation travelled!
Speed = distance / time – divide
So, for example, our line was 10 meters (m) long and it took 2 seconds for our Lego Person to travel the line.
10/ 2 = 5
Therefore, our creation travelled at 5m per second.
Did you know the International Space Station Travels at 7,600 metres per second!
Want to Learn More? Extend the Activity
After successfully getting one figure down the line, let’s see how many more you can get down? This is a perfect way to look at variable speeds…
- Experiment with different types of line and angles.
- What difference does the material or angel make to the speed of the cart? Does it make any other difference?
- What happens when you add weight to your Lego cart? Try adding weight to the front, middle and back on different runs down the line and try and predict what effect it will have.
- Record the times, and any other changes you notice, work out the speeds, and see if you can make a conclusion at the end of your experiment.
- Evaluate which cart worked best and why, and which line work best and why. Which was the slowest? Do you know why? Which combinations worked better together? Was the “best” cart your favourite, or did you prefer one that didn’t work so well? Why?
You are doing a super job investigating how science, design, and maths all work together!
I hope you have enjoyed making your zip line and hopefully your Lego person didn’t fall out!We always love to see peoples creations, so feel free to email them or post in the comments below. You can always message us if you want help also, via email or social media.
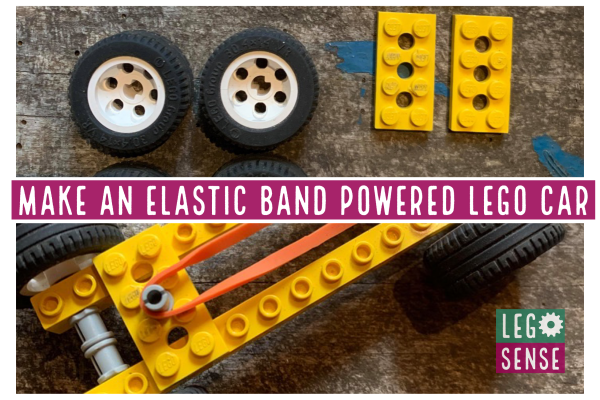
If you want to keep building why not try our elastic band powered car.
I’ll be back soon with some more exciting Lego STEAM ideas!
Parents and teachers, please feel free to contact me with any questions or comments!
Caring is Sharing
If you would like to share this post please use the image below, thank you!


