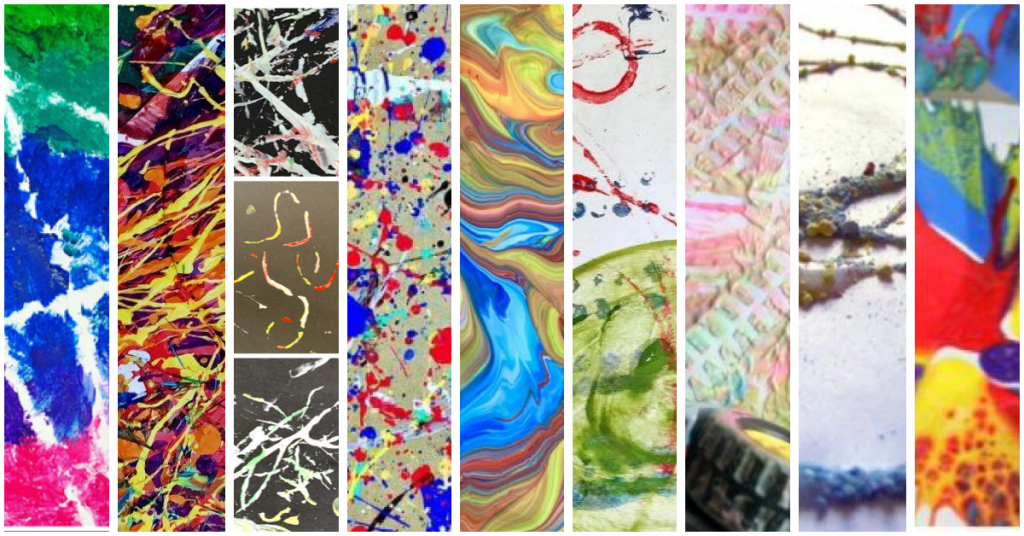
Hi guys, so with home learning continuing, and the summer “holidays” approaching, I know that you are looking for easy art to do at home with your kids.
There are tons of ideas on Pinterest, but many of them are product orientated art and craft activities, which although look great, they don’t necessarily teach children very much, and are either completed very quickly, or leave children feeling disappointed in themselves or like they haven’t done it right! Boo! Whereas, process art is about going through a creative process that teaches techniques, manipulation of material, as well as building cognitive skills and artistic style. It also encourages relaxation, self esteem, focus and confidence, not to mention a love of art.
So here are some ideas for you – let me know how you get on in the comments, or over on our Facebook group, or page!
Crushed Chalk Art
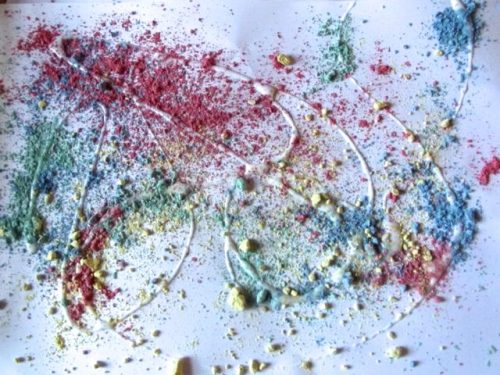
This is an activity I blogged about years ago on my old blog, Creative Playhouse (it has lots of activities aimed at 0-6 year olds, including art, sensory play, play dough recipes, and homemade creative play). Read the full post here.
Crushed Chalk Art is a really fun activity that we have done many times at home, and during our Art Camp and Art Academy. Its a way of using colour and texture without the usual paints. Children love to smash up the chalk, drizzle the glue, and see the colours emerge as you sprinkle the crushed chalk onto the paper.
It is a great activity for colour exploration, playing with texture and self expression. And you will want to get involved too. Its a really good sensory experience as well as a process art activity. The end results are expressive and beautiful too, which is a bonus for this one!
Drill Spin Art
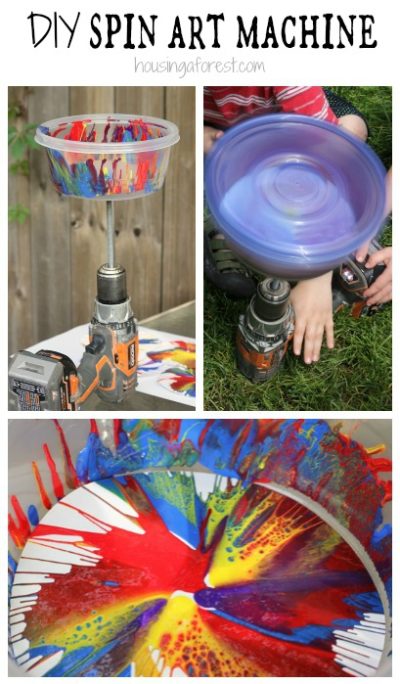
Spin art is a tried and tested process art activity for children of all ages. You can get proper machines to do it, try out a salad spinner, or make up your own novel way of doing it. But this Drill Spin Art from Housing a Forest is an awesome idea! Click over to their post for all the details and instructions!
Splatter Painting
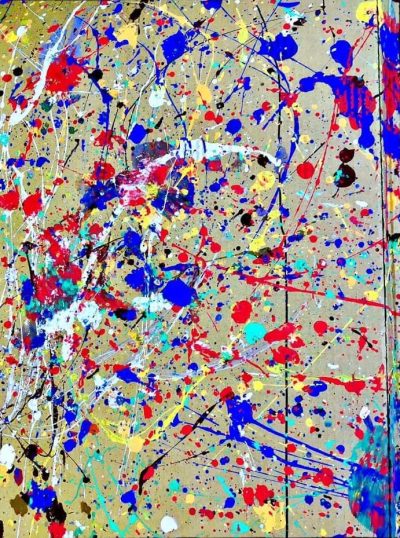
Splatter Painting
Made famous by Jackson Pollock, splatter art is a contemporary addition to many artists portfolio, whether as a standalone abstract technique, or as part of an animal portrait or landscape. The picture above is from students working together at our summer art camp last year – isn’t it brilliant?
I personally use it a lot in my work, as a way of creating expression and highlights in the colour or scape of the picture. Here is an example:

Splatter painting for kids is super fun! You simply need a surface to paint on, some paint, and water and a paintbrush. The paint many need some water added to it, depending on what kind it is; experiment and have fun! Load the brush up with a little paint and aim the brush at the canvas or paper, and make a gesture like you are hitting a drum, but away from the surface. You can also hold the brush steady in one hand and then tap the brush firmly with the other hand to get a slightly different effect. Then do it again with a different colour. Its all about experimenting with what works for your child!
This is such a fun, exciting and expressive art activity. It uses the full body so hits the gross motor and fine motor development, as well as inspiring creativity, a love of art, and nurturing self esteem, when they produce amazing pieces of art that they are super proud of!
Drip and Drizzle Painting

Drip and Drizzle Painting
This is a great progression from splatter painting. It is also very self explanatory. This activity literally involves dripping and drizzling paint on the canvas or paper, to create a really fantastic abstract picture.
I would say that the best paint to use for this is the traditional school paint, also known as poster paint, or ready mix paint. The colours don’t mix together as water colour type paints would, so each colour stays vibrant and vivid. They do take a little time to dry, but they look fantastic, and the bonus is most poster paints are totally washable!
Drizzle painting is a great way to explore colour and texture in art, and you can add things to the wet paint too, such as glitter or sequins to create even more effects.
Printing with Toys and Objects
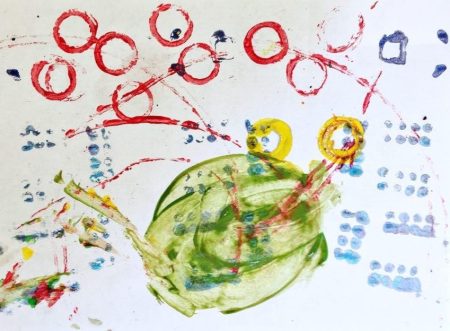
- Printing with Toys and Objects
This is so addictive (in the best way), and super fun. It allows for lots of exploration and creativity, as well as helping to develop fine motor skills, math skills, pattern making, spacial awareness, and aesthetic decision making.
Depending on your children, you can pre-select the items you want to print with, or you may have a theme in mind that you are working with, and so choose items that reflect that. Otherwise, you can ask children to pick out items that they think would work well.
Here are some suggestions:
- Lego or Duplo bricks
- Nuts, bolts and washers
- Wooden blocks
- Potato Masher, forks, pizza cutters, and other cooking implements
- Cups and glasses (both ends)
- Cookie cutters
- Spanners and other safe tools
- Dish washing brushers and sponges
- Old jigsaw pieces
Rolling Art
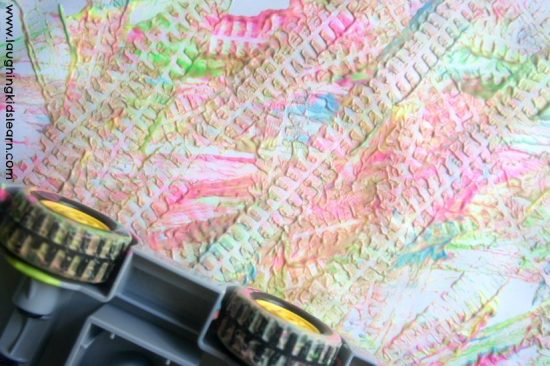
This was such a hit at our art camp last summer, but I actually can’t find any pictures of it! So I went looking online to see if any fellow bloggers had managed to capture this activity in all its glory….! The lovely Laughing Kids Learn has a nice post on this activity, which you can check out here.
The only thing I would add to this is a ramp! When we did it at art camp, we set up a wooden ramp, covered in large paper, that the kids could roll their cars down – this was so much fun, and the rolling gave even more of a random abstract result, plus lots of learning about gravity, velocity and aero dynamics to be had too!
Try printing on different surfaces to see what differences occur, and different vehicles, or even wheels on their own – for example, Lego and Duplo often have separate wheels.
What else will roll down a ramp? Ask children to find other objects that will work, some examples could be: marbles, pine cones, pebbles, ping pong balls or bottle tops. Experiment with the height and angle of the ramp to see how the objects roll differently. Kids can race their cars or objects down too!
String Painting
String Painting
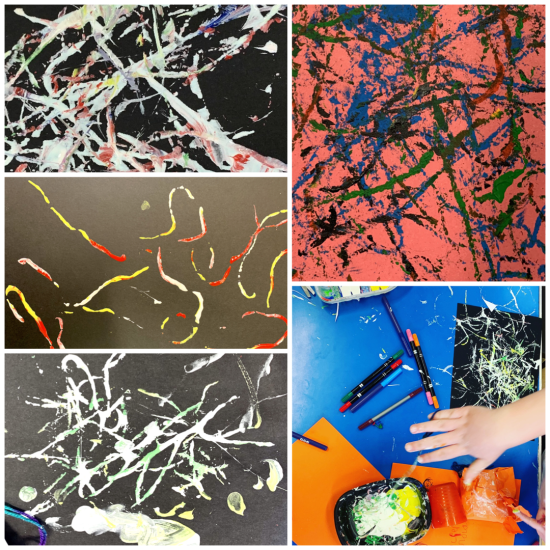
This a really simple activity, which in my experience, kids and grown ups absolutely love! To paint with string, you just need some wool, yarn or string, some paint (any kind works really as long as enough water is added), and a surface to paint on. The paint needs to be on a pallet or in a tray so that the string can be dipped into it.
To start, dip a small length of string into the paint, then repeat the dipping action on the paper, so that the string creates a wiggly line, then lift the string off to see your results. Try experimenting with different lengths of string, and different amounts of paints to see what happens. You can let this be totally random, or you can try and create shapes, letters or patterns.
The rhythmic action of dipping and lifting the string is very therapeutic and calming. This activity is also fantastic for fine motor skills and coordination, as well as having all the other benefits of process art!
Pour Painting

Pour Painting
You may have seen mesmerising videos of people doing pour painting on Facebook or Youtube? It really is lovely to watch, but it is even more fun to do it, and the results can be spectacular!
Poppy and I tried this for the first time just this week, and we loved it!! I’m actually not sure what type of paints the “pros” use, but we used ready mixed poster paints as I knew the colours wouldn’t merge together too much, which is the effect that you need.
We filled a jar with different coloured paints, in layers, and gave it a very light stir, then we poured it onto the paper. Once happy with the amount, we picked up the paper and let the paint run into drips and patterns. This created some wonderful results by itself, but we wanted to see what else we could do, so we used a sharp wooden stick to lightly draw the paint into more intricate patterns.
This process art was genuinely delightful to do. I loved how the results look a rock geode, or the surface of a gas planet, and I can’t wait to use this technique again for future projects.
A couple of side notes: I would advise heavy paper, card or even a board as it does require a fair amount of paint. And, the paint does take a while to dry, and it will need to be left to dry on a flat surface, not hanging up!!
Resist Painting

This activity is great fun, and has many possibilities and variations! Kids and grown ups enjoy this, and its a good one to try collaboratively. It’s a great way to explore shape, patter, composition and abstraction!
You will simply need a surface to paint on, any kind of paints, pastels, pencils or pens, and some tape, ribbon, string, or anything else you would like to try.
Simply, place or stick the “resist” material on the painting surface in a shape, pattern, or in an abstract manor. Then, using your chosen medium, colour the entire paper in different colours, or even the same colour if you choose. When the paint, pastels or pens are sufficiently dry, you then carefully peel off the resist material to reveal negative spaces amongst your colourful art.
This can create interesting geometric shapes and patterns with very defined and straight lines, or more textured lines that are a bit rough around the edges. Experiment with different materials and find what works for you and your kids! In my experience wide masking tape never misses the mark tho! Kids love the sensation of peeling it off and seeing their work unfold in front of them!
So there you have it – 9 brilliant process art activities to try at home. I hope you enjoy trying them out. Process really is so great for kids in so many ways.
There are lots more ideas to try too, and I am already planning a second post, so be sure to check back soon. In the meantime, please do share your and your children’s wonderful creations! We have a lovely Facebook group which I would encourage you to join, or if you’re not a FB person, feel free to drop me a comment or email!
Keep safe, keep smiling, and keep creating.
Much love,





Great post! Thank you for including Laughing Kids Learn
You’re welcome – its a great blog, that Ive been reading for years 🙂